
Sharding-JDBC分布式事务之(五)BASE事务(Seata框架——AT模式的启动)
Seata框架——AT模式的启动Sharding中如何运用AT
Seata框架启动
Seata框架——AT模式的启动
Seat框架的启动需要配置服务中心和配置中心,一下我将介绍通过配置到nacos方式启动,和通过file方式(直连)启动的示例
我们先对配置文件嘴一个介绍,个人理解。
配置文件:
TC服务端:
registry.conf:服务中心 与配置中心配置
file.conf: 文件配置中心 (在registry.conf指定配置中心为file)
客户端(TM,RM):
registry.conf:服务中心,与TC端配置 相同
file.conf: 配置中心 声明服务端所属事务组
seata:声明客户端事务组
1. 服务中心为nacos方式启动seata
1.1 nacos启动与建表
在安装目录bin下可以选择windows系统启动还是linux系统启动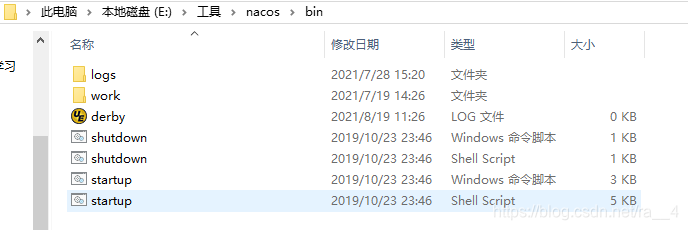
windows系统启动成功后如图,默认端口为8848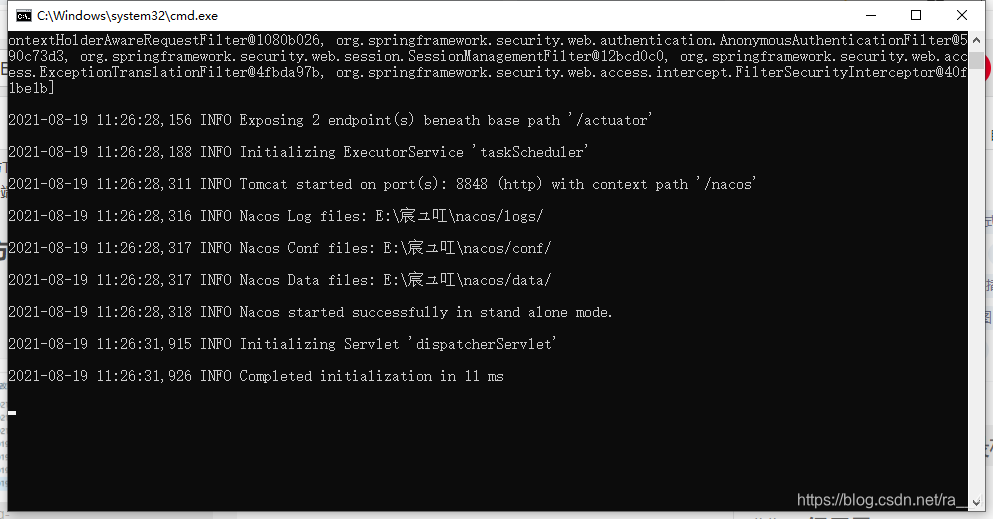
浏览器访问http://localhost:8848/nacos/index.html#/login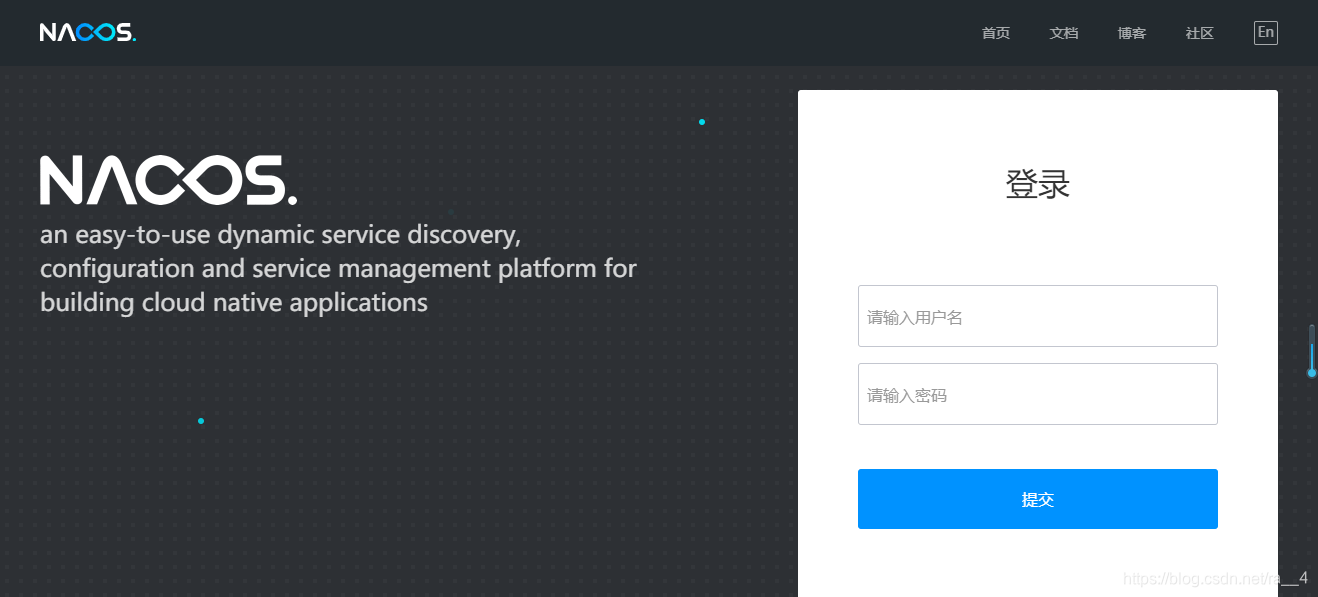
账户密码都是nacos
接下来我们就seata配置信息注册到nacos中心中
在E:\工具\seata目录下创建config.txt
在E:\工具\seata\conf目录下创建naocs-config.sh
config.txt
transport.type=TCP
transport.server=NIO
transport.heartbeat=true
transport.thread-factory.boss-thread-prefix=NettyBoss
transport.thread-factory.worker-thread-prefix=NettyServerNIOWorker
transport.thread-factory.server-executor-thread-prefix=NettyServerBizHandler
transport.thread-factory.share-boss-worker=false
transport.thread-factory.client-selector-thread-prefix=NettyClientSelector
transport.thread-factory.client-selector-thread-size=1
transport.thread-factory.client-worker-thread-prefix=NettyClientWorkerThread
transport.thread-factory.boss-thread-size=1
transport.thread-factory.worker-thread-size=8
transport.shutdown.wait=3
service.vgroupMapping.my_test_tx_group=default
service.enableDegrade=false
service.disable=false
service.max.commit.retry.timeout=-1
service.max.rollback.retry.timeout=-1
client.async.commit.buffer.limit=10000
client.lock.retry.internal=10
client.lock.retry.times=30
store.mode=db
store.file.dir=file_store/data
store.file.max-branch-session-size=16384
store.file.max-global-session-size=512
store.file.file-write-buffer-cache-size=16384
store.file.flush-disk-mode=async
store.file.session.reload.read_size=100
store.db.driverClassName=com.mysql.jdbc.Driver
store.db.datasource=dbcp
store.db.dbType=mysql
store.db.url=jdbc:mysql://127.0.0.1:3306/seata?rewriteBatchedStatements=true
store.db.user=root
store.db.password=root
store.db.min-conn=1
store.db.max-conn=3
store.db.global.table=global_table
store.db.branch.table=branch_table
store.db.query-limit=100
store.db.lock-table=lock_table
recovery.committing-retry-period=1000
recovery.asyn-committing-retry-period=1000
recovery.rollbacking-retry-period=1000
recovery.timeout-retry-period=1000
transaction.undo.data.validation=true
transaction.undo.log.serialization=jackson
transaction.undo.log.save.days=7
transaction.undo.log.delete.period=86400000
transaction.undo.log.table=undo_log
transport.serialization=seata
transport.compressor=none
metrics.enabled=false
metrics.registry-type=compact
metrics.exporter-list=prometheus
metrics.exporter-prometheus-port=9898
service.default.grouplist=127.0.0.1:8091
当store.mode=db时需要在数据库中创建一个名为seata的数据库,其中存放3张表用于记录事务日志和控制全局锁的生成释放。以下为建表sql语句(mysql)表名也可以在store.db.下修改。
drop table if exists `global_table`;
create table `global_table` (
  `xid` varchar(128)  not null,
  `transaction_id` bigint,
  `status` tinyint not null,
  `application_id` varchar(32),
  `transaction_service_group` varchar(32),
  `transaction_name` varchar(128),
  `timeout` int,
  `begin_time` bigint,
  `application_data` varchar(2000),
  `gmt_create` datetime,
  `gmt_modified` datetime,
  primary key (`xid`),
  key `idx_gmt_modified_status` (`gmt_modified`, `status`),
  key `idx_transaction_id` (`transaction_id`)
);

-- the table to store BranchSession data
drop table if exists `branch_table`;
create table `branch_table` (
  `branch_id` bigint not null,
  `xid` varchar(128) not null,
  `transaction_id` bigint ,
  `resource_group_id` varchar(32),
  `resource_id` varchar(256) ,
  `lock_key` varchar(128) ,
  `branch_type` varchar(8) ,
  `status` tinyint,
  `client_id` varchar(64),
  `application_data` varchar(2000),
  `gmt_create` datetime,
  `gmt_modified` datetime,
  primary key (`branch_id`),
  key `idx_xid` (`xid`)
);

-- the table to store lock data
drop table if exists `lock_table`;
create table `lock_table` (
  `row_key` varchar(128) not null,
  `xid` varchar(96),
  `transaction_id` long ,
  `branch_id` long,
  `resource_id` varchar(256) ,
  `table_name` varchar(32) ,
  `pk` varchar(36) ,
  `gmt_create` datetime ,
  `gmt_modified` datetime,
  primary key(`row_key`)
);
另外需要在每个要使用的数据库中建一个名为undo_log的表,存放回滚数据。
-- the table to store seata xid data
-- 0.7.0+ add context
-- you must to init this sql for you business databese. the seata server not need it.
-- 此脚本必须初始化在你当前的业务数据库中,用于AT 模式XID记录。与server端无关(注:业务数据库)
-- 注意此处0.3.0+ 增加唯一索引 ux_undo_log
drop table if exists `undo_log`;
CREATE TABLE `undo_log` (
  `id` bigint(20) NOT NULL AUTO_INCREMENT,
  `branch_id` bigint(20) NOT NULL,
  `xid` varchar(100) NOT NULL,
  `context` varchar(128) NOT NULL,
  `rollback_info` longblob NOT NULL,
  `log_status` int(11) NOT NULL,
  `log_created` datetime NOT NULL,
  `log_modified` datetime NOT NULL,
  `ext` varchar(100) DEFAULT NULL,
  PRIMARY KEY (`id`),
  UNIQUE KEY `ux_undo_log` (`xid`,`branch_id`)
) ENGINE=InnoDB AUTO_INCREMENT=1 DEFAULT CHARSET=utf8;
建好表后在config.txt配置文件填入正确url和账号密码
由于seata是通过jdbc的executeBatch来批量插入全局锁的,所以连接参数中的rewriteBatchedStatements为true时,会大大提高批量插入的性能。根据实际的测试,该参数设置为true后,对应的批量插入性能为原来的10倍多。所以建议在url设置rewriteBatchedStatements=true。
nacos-config.sh
这个nacos官网有,内容如下
#!/usr/bin/env bash
# Copyright 1999-2019 Seata.io Group.
#
# Licensed under the Apache License, Version 2.0 (the "License");
# you may not use this file except in compliance with the License.
# You may obtain a copy of the License at、
#
#      http://www.apache.org/licenses/LICENSE-2.0
#
# Unless required by applicable law or agreed to in writing, software
# distributed under the License is distributed on an "AS IS" BASIS,
# WITHOUT WARRANTIES OR CONDITIONS OF ANY KIND, either express or implied.
# See the License for the specific language governing permissions and
# limitations under the License.

while getopts ":h:p:g:t:u:w:" opt
do
  case $opt in
  h)
    host=$OPTARG
    ;;
  p)
    port=$OPTARG
    ;;
  g)
    group=$OPTARG
    ;;
  t)
    tenant=$OPTARG
    ;;
  u)
    username=$OPTARG
    ;;
  w)
    password=$OPTARG
    ;;
  ?)
    echo " USAGE OPTION: $0 [-h host] [-p port] [-g group] [-t tenant] [-u username] [-w password] "
    exit 1
    ;;
  esac
done

urlencode() {
  for ((i=0; i < ${#1}; i++))
  do
    char="${1:$i:1}"
    case $char in
    [a-zA-Z0-9.~_-]) printf $char ;;
    *) printf '%%%02X' "'$char" ;;
    esac
  done
}

if [[ -z ${host} ]]; then
    host=localhost
fi
if [[ -z ${port} ]]; then
    port=8848
fi
if [[ -z ${group} ]]; then
    group="SEATA_GROUP"
fi
if [[ -z ${tenant} ]]; then
    tenant=""
fi
if [[ -z ${username} ]]; then
    username=""
fi
if [[ -z ${password} ]]; then
    password=""
fi

nacosAddr=$host:$port
contentType="content-type:application/json;charset=UTF-8"

echo "set nacosAddr=$nacosAddr"
echo "set group=$group"

failCount=0
tempLog=$(mktemp -u)
function addConfig() {
  curl -X POST -H "${contentType}" "http://$nacosAddr/nacos/v1/cs/configs?dataId=$(urlencode $1)&group=$group&content=$(urlencode $2)&tenant=$tenant&username=$username&password=$password" >"${tempLog}" 2>/dev/null
  if [[ -z $(cat "${tempLog}") ]]; then
    echo " Please check the cluster status. "
    exit 1
  fi
  if [[ $(cat "${tempLog}") =~ "true" ]]; then
    echo "Set $1=$2 successfully "
  else
    echo "Set $1=$2 failure "
    (( failCount++ ))
  fi
}

count=0
for line in $(cat $(dirname "$PWD")/config.txt | sed s/[[:space:]]//g); do
  (( count++ ))
	key=${line%%=*}
    value=${line#*=}
	addConfig "${key}" "${value}"
done

echo "========================================================================="
echo " Complete initialization parameters,  total-count:$count ,  failure-count:$failCount "
echo "========================================================================="

if [[ ${failCount} -eq 0 ]]; then
	echo " Init nacos config finished, please start seata-server. "
else
	echo " init nacos config fail. "
fi
注意config.txt需要在nacos-config上级目录下,运行nacos-config.sh可以看会把config中的配置参数传到nacos配置中心去
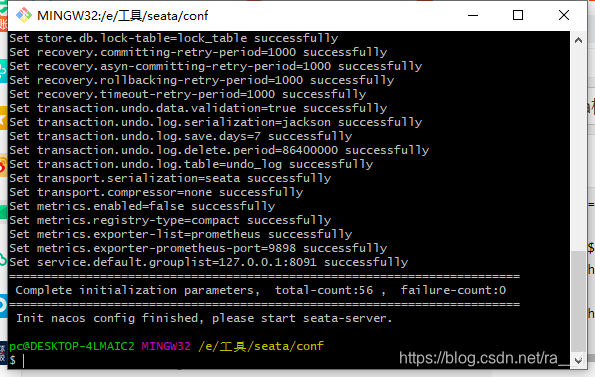
成功,可以看到nacos配置列表已有配置参数了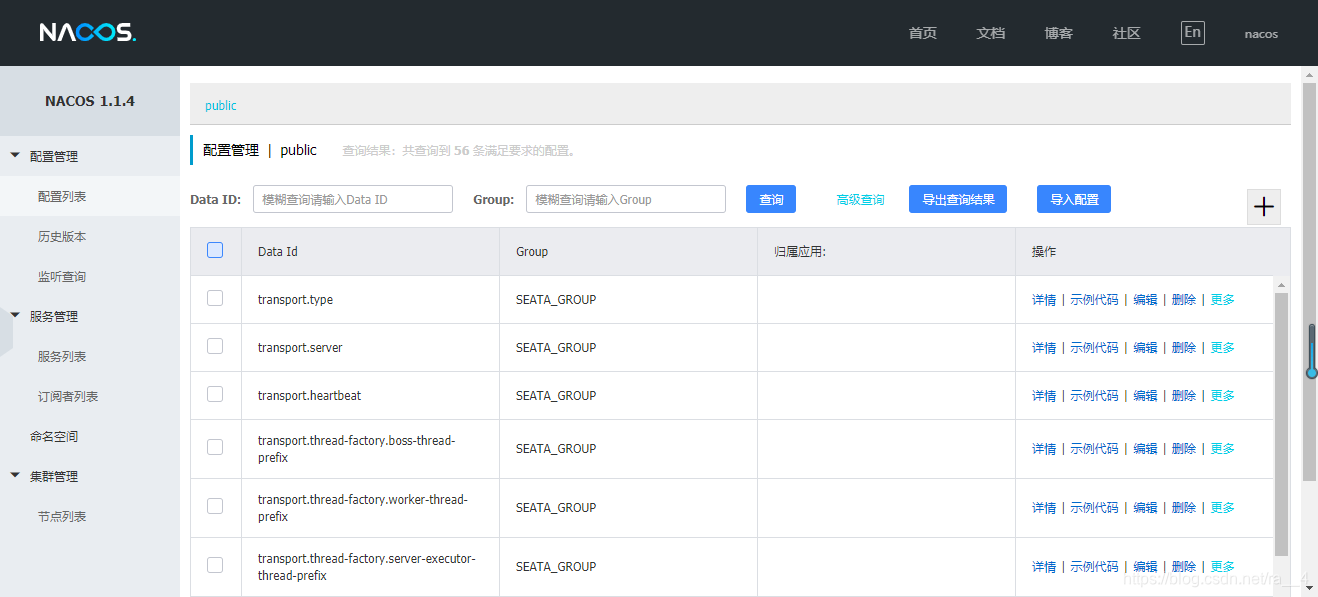
接下来就是启动seata-server。
1.2 registry.conf
TC服务端配置,在你下载的seata/conf中配置registry.conf
registry {
  # file 、nacos 、eureka、redis、zk、consul、etcd3、sofa
  type = "nacos"
  loadBalance = "RandomLoadBalance"
  loadBalanceVirtualNodes = 10

  nacos {
    application = "seata-server"
    serverAddr = "127.0.0.1"
    group = "SEATA_GROUP"
    namespace = ""
    cluster = "default"
    username = "nacos"
    password = "nacos"
  }
  eureka {
    serviceUrl = "http://localhost:8761/eureka"
    application = "default"
    weight = "1"
  }
  redis {
    serverAddr = "localhost:6379"
    db = 0
    password = ""
    cluster = "default"
    timeout = 0
  }
  zk {
    cluster = "default"
    serverAddr = "127.0.0.1:2181"
    sessionTimeout = 6000
    connectTimeout = 2000
    username = ""
    password = ""
  }
  consul {
    cluster = "default"
    serverAddr = "127.0.0.1:8500"
  }
  etcd3 {
    cluster = "default"
    serverAddr = "http://localhost:2379"
  }
  sofa {
    serverAddr = "127.0.0.1:9603"
    application = "default"
    region = "DEFAULT_ZONE"
    datacenter = "DefaultDataCenter"
    cluster = "default"
    group = "SEATA_GROUP"
    addressWaitTime = "3000"
  }
  file {
    name = "file.conf"
  }
}

config {
  # file、nacos 、apollo、zk、consul、etcd3
  type = "nacos"

  nacos {
    serverAddr = "127.0.0.1"
    namespace = ""
    group = "SEATA_GROUP"
    cluster = "default"
    username = "nacos"
    password = "nacos"
  }
  consul {
    serverAddr = "127.0.0.1:8500"
  }
  apollo {
    appId = "seata-server"
    apolloMeta = "http://192.168.1.204:8801"
    namespace = "application"
    apolloAccesskeySecret = ""
  }
  zk {
    serverAddr = "127.0.0.1:2181"
    sessionTimeout = 6000
    connectTimeout = 2000
    username = ""
    password = ""
  }
  etcd3 {
    serverAddr = "http://localhost:2379"
  }
  file {
    name = "file.conf"
  }
}
无论registry还是config,type都选择nacos,再把nacos启动相应地址改了即可。
启动seata-server!
同样在bin目录下有seata框架的启动脚本
启动成功!端口为8091,注意启动时会从nacos配置中心读取配置,所以需要先启动nacos,还有如果部分参数读取失败可能是下划线无法转换为驼峰,要现在nacos配置中心检查此参数是否存在,再在config.txt相应修改重新上传。
1.3 客户端(TM,RM)配置
首先,如果nacos启动需要先加入nacos依赖以及seata相关依赖
		<!-- 使用 seata 事务框架 -->
		<dependency>
			<groupId>io.seata</groupId>
			<artifactId>seata-all</artifactId>
			<version>1.4.0</version>
		</dependency>
		<!-- shardingJDBC-BASE -->
		<dependency>
			<groupId>org.apache.shardingsphere</groupId>
			<artifactId>shardingsphere-transaction-base-seata-at</artifactId>
			<version>5.0.0-alpha</version>
		</dependency>
		<!-- 使用 nacos -->
		<dependency>
			<groupId>com.alibaba.nacos</groupId>
			<artifactId>nacos-client</artifactId>
			<version>1.1.4</version>
		</dependency>
前两个是seata依赖,因为本示例是针对ShardingJDBC对seata框架的应用,则需要引整合依赖包。不需要使用shardingJDBC的话可以去掉整合依赖包。
接下来在src/main/resources下配置三个文件 registry.conf,seata.conf,file.conf
registry.conf
registry {
  # file 、nacos 、eureka、redis、zk、consul、etcd3、sofa
  type = "nacos"
  loadBalance = "RandomLoadBalance"
  loadBalanceVirtualNodes = 10

  nacos {
    application = "seata-server"
    serverAddr = "127.0.0.1:8848"
    group = "SEATA_GROUP"
    namespace = ""
    username = "nacos"
    password = "nacos"
  }
  eureka {
    serviceUrl = "http://localhost:8761/eureka"
    application = "default"
    weight = "1"
  }
  redis {
    serverAddr = "localhost:6379"
    db = 0
    password = ""
    cluster = "default"
    timeout = 0
  }
  zk {
    cluster = "default"
    serverAddr = "127.0.0.1:2181"
    sessionTimeout = 6000
    connectTimeout = 2000
    username = ""
    password = ""
  }
  consul {
    cluster = "default"
    serverAddr = "127.0.0.1:8500"
  }
  etcd3 {
    cluster = "default"
    serverAddr = "http://localhost:2379"
  }
  sofa {
    serverAddr = "127.0.0.1:9603"
    application = "default"
    region = "DEFAULT_ZONE"
    datacenter = "DefaultDataCenter"
    cluster = "default"
    group = "SEATA_GROUP"
    addressWaitTime = "3000"
  }
  file {
    name = "file.conf"
  }
}

config {
  # file、nacos 、apollo、zk、consul、etcd3
  type = "nacos"

  nacos {
    serverAddr = "127.0.0.1:8848"
    namespace = ""
    group = "SEATA_GROUP"
    username = "nacos"
    password = "nacos"
  }
  consul {
    serverAddr = "127.0.0.1:8500"
  }
  apollo {
    appId = "seata-server"
    apolloMeta = "http://192.168.1.204:8801"
    namespace = "application"
    apolloAccesskeySecret = ""
  }
  zk {
    serverAddr = "127.0.0.1:2181"
    sessionTimeout = 6000
    connectTimeout = 2000
    username = ""
    password = ""
  }
  etcd3 {
    serverAddr = "http://localhost:2379"
  }
  file {
    name = "file.conf"
  }
}
基本和seata服务端一样。
seata.conf
client {
    application.id = example    ## 应用唯一主键
    transaction.service.group = my_test_tx_group   ## 所属事务组
}
file.conf
service {
  vgroupMapping.my_test_tx_group = "default" #修改事务组名称为:my_test_tx_group,和客户端自定义的名称对应
  #only support single node
  default.grouplist = "127.0.0.1:8091"
  #degrade current not support
  enableDegrade = false
  #disable
  disable = false
  #unit ms,s,m,h,d represents milliseconds, seconds, minutes, hours, days, default permanent
  max.commit.retry.timeout = "-1"
  max.rollback.retry.timeout = "-1"
}
启动springboot项目!没有报错并且控制台能看到seata的初始化日志,那就意味着启动成功了
2. 服务中心为file(直连)方式启动seata
直连方式较为简单,官网并没有详细介绍,大概只是用于快速体验seata或者用于从测试。
2.1 seata服务器启动配置
在seata目录conf文件夹下配置registry.conf与file.conf
registry.conf
设置服务中心和配置中心的type=“file”
registry {
  # file 、nacos 、eureka、redis、zk、consul、etcd3、sofa
  type = "file"
  loadBalance = "RandomLoadBalance"
  loadBalanceVirtualNodes = 10

  nacos {
    application = "seata-server"
    serverAddr = "127.0.0.1"
    group = "SEATA_GROUP"
    namespace = ""
    cluster = "default"
    username = "nacos"
    password = "nacos"
  }
  eureka {
    serviceUrl = "http://localhost:8761/eureka"
    application = "default"
    weight = "1"
  }
  redis {
    serverAddr = "localhost:6379"
    db = 0
    password = ""
    cluster = "default"
    timeout = 0
  }
  zk {
    cluster = "default"
    serverAddr = "127.0.0.1:2181"
    sessionTimeout = 6000
    connectTimeout = 2000
    username = ""
    password = ""
  }
  consul {
    cluster = "default"
    serverAddr = "127.0.0.1:8500"
  }
  etcd3 {
    cluster = "default"
    serverAddr = "http://localhost:2379"
  }
  sofa {
    serverAddr = "127.0.0.1:9603"
    application = "default"
    region = "DEFAULT_ZONE"
    datacenter = "DefaultDataCenter"
    cluster = "default"
    group = "SEATA_GROUP"
    addressWaitTime = "3000"
  }
  file {
    name = "file.conf"
  }
}

config {
  # file、nacos 、apollo、zk、consul、etcd3
  type = "file"

  nacos {
    serverAddr = "127.0.0.1"
    namespace = ""
    group = "SEATA_GROUP"
    cluster = "default"
    username = "nacos"
    password = "nacos"
  }
  consul {
    serverAddr = "127.0.0.1:8500"
  }
  apollo {
    appId = "seata-server"
    apolloMeta = "http://192.168.1.204:8801"
    namespace = "application"
    apolloAccesskeySecret = ""
  }
  zk {
    serverAddr = "127.0.0.1:2181"
    sessionTimeout = 6000
    connectTimeout = 2000
    username = ""
    password = ""
  }
  etcd3 {
    serverAddr = "http://localhost:2379"
  }
  file {
    name = "file.conf"
  }
}
file.conf
此文件存储配置参数,名称由registry.conf 中file参数name = "file.conf"觉得决定。
## transaction log store, only used in seata-server
store {
  ## store mode: file、db、redis
  mode = "db"

  ## file store property
  file {
    ## store location dir
    dir = "sessionStore"
    # branch session size , if exceeded first try compress lockkey, still exceeded throws exceptions
    maxBranchSessionSize = 16384
    # globe session size , if exceeded throws exceptions
    maxGlobalSessionSize = 512
    # file buffer size , if exceeded allocate new buffer
    fileWriteBufferCacheSize = 16384
    # when recover batch read size
    sessionReloadReadSize = 100
    # async, sync
    flushDiskMode = async
  }

  ## database store property
  db {
    ## the implement of javax.sql.DataSource, such as DruidDataSource(druid)/BasicDataSource(dbcp)/HikariDataSource(hikari) etc.
    datasource = "druid"
    ## mysql/oracle/postgresql/h2/oceanbase etc.
    dbType = "mysql"
    driverClassName = "com.mysql.jdbc.Driver"
    url = "jdbc:mysql://127.0.0.1:3306/seata?rewriteBatchedStatements=true"
    user = "root"
    password = "root"
    minConn = 5
    maxConn = 100
    globalTable = "global_table"
    branchTable = "branch_table"
    lockTable = "lock_table"
    queryLimit = 100
    maxWait = 5000
  }

  ## redis store property
  redis {
    host = "127.0.0.1"
    port = "6379"
    password = ""
    database = "0"
    minConn = 1
    maxConn = 10
    maxTotal = 100
    queryLimit = 100
  }

}
同理也需要建库建表,建表语句1.1已经介绍。这里不作过多描述
2.2 客户端(TM,RM)配置
maven依赖设置见1.3小节
在src/main/resources下配置registry.conf和file.conf
registry.conf
和1.3中的registry.conf基本一样,只是把服务中心和配置中心的 type设置为“file”
registry {
  # file 、nacos 、eureka、redis、zk、consul、etcd3、sofa
  type = "file"
  loadBalance = "RandomLoadBalance"
  loadBalanceVirtualNodes = 10

  nacos {
    application = "seata-server"
    serverAddr = "127.0.0.1:8848"
    group = "SEATA_GROUP"
    namespace = ""
    username = "nacos"
    password = "nacos"
  }
  eureka {
    serviceUrl = "http://localhost:8761/eureka"
    application = "default"
    weight = "1"
  }
  redis {
    serverAddr = "localhost:6379"
    db = 0
    password = ""
    cluster = "default"
    timeout = 0
  }
  zk {
    cluster = "default"
    serverAddr = "127.0.0.1:2181"
    sessionTimeout = 6000
    connectTimeout = 2000
    username = ""
    password = ""
  }
  consul {
    cluster = "default"
    serverAddr = "127.0.0.1:8500"
  }
  etcd3 {
    cluster = "default"
    serverAddr = "http://localhost:2379"
  }
  sofa {
    serverAddr = "127.0.0.1:9603"
    application = "default"
    region = "DEFAULT_ZONE"
    datacenter = "DefaultDataCenter"
    cluster = "default"
    group = "SEATA_GROUP"
    addressWaitTime = "3000"
  }
  file {
    name = "file.conf"
  }
}

config {
  # file、nacos 、apollo、zk、consul、etcd3
  type = "file"

  nacos {
    serverAddr = "127.0.0.1:8848"
    namespace = ""
    group = "SEATA_GROUP"
    username = "nacos"
    password = "nacos"
  }
  consul {
    serverAddr = "127.0.0.1:8500"
  }
  apollo {
    appId = "seata-server"
    apolloMeta = "http://192.168.1.204:8801"
    namespace = "application"
    apolloAccesskeySecret = ""
  }
  zk {
    serverAddr = "127.0.0.1:2181"
    sessionTimeout = 6000
    connectTimeout = 2000
    username = ""
    password = ""
  }
  etcd3 {
    serverAddr = "http://localhost:2379"
  }
  file {
    name = "file.conf"
  }
}
file.conf
spring.cloud.alibaba.seata.tx-service-group=my_test_tx_group
service {
      vgroupMapping.my_test_tx_group = "default"
      default.grouplist = "127.0.0.1:8091"
    }
启动springboot项目!没有报错并且控制台能看到seata的初始化日志,那就意味着启动成功了
ShardingJDBC中如何运用AT
通过@ShardingTransactionType(TransactionType.BASE) 与
@Transactional配合使用启动shardingjdbc的BASE事务。
建议加载service层方法上。
经过测试本项目@ShardingTransactionType(TransactionType.BASE) 注解失效,通过自定义注解代替其功能,详细说明可以看Sharding-JDBC分布式事务总结(二)之@ShardingTransaction()注解切换失效问题.
更多推荐


 0
0 0
0- 0


 已为社区贡献1条内容

所有评论(0)